ORC Spring 2024 - Week 5

Hello internet people, I’m back!!

If you noticed, I missed the last two weeks of updates. If you didn’t notice, totally fine. No biggie. Coolcoolcool.

These missed weeks were a combination of a planned break (vacation – yay!) and not planned (illness! A new HVAC!). It turns out that it has not been such a great time to launch my first One Room Challenge. LOLZ. But such is life, eh? I think it is just making the wins that I do get that much more satisfying and empowering.

So, on to the wins for the past couple of weeks. We’ll start with the non-ORC win: vacation in the Dominican Republic. I’m still riding the high of this one! As much as the vacation was amazing, the lead up to vacation was peak STRUGGLE. Not the usual packing procrastination panic. It was more of a full sprint to the very end just to get on the plane (fortunately not literally). The chaos was a collision between having PINK EYE and COVID back-to-back (which means having to reschedule a ton of clients), trying to squeeze everything in before I left so client projects were humming along in my absence, and having my HVAC conk out on the first warm day. Oy. It was a lot to deal with all at once. And I have to give a special little shoutout to Frank who was able to rearrange his schedule a bit to meet the HVAC techs and make sure we could get it replaced before we left for the DR. We couldn’t have our baby cat Minion sweltering all alone, could we?? We could NOT.

Pics of the gorgeous view that greeted us at the resort, a few vacation pics, and our fur child, Mini(on):

the views from hyatt zilara lobby

the hyatt zilara spa - made to look like a cave with a cenote! omg, take me back.

the fruit was to die for! i miss passionfruit soooooo much

we got up for sunrise one morning. it was glorious

Mini doing her best to look sad and miserable, even though she has the best aunties in the world

mini getting love from an auntie with her favorite catnip rainbow. “mommy, come home!”

Anyhow, y’all aren’t here for travel pics, so let’s get on with the actual ORC update. Last time I blogged, I shared my inspiration pictures and my design board. As I am wont to do, I ordered some samples to make sure the color/texture/quality was what I wanted. Here is the 3D design board that I have haphazardly propped up in the bathroom:

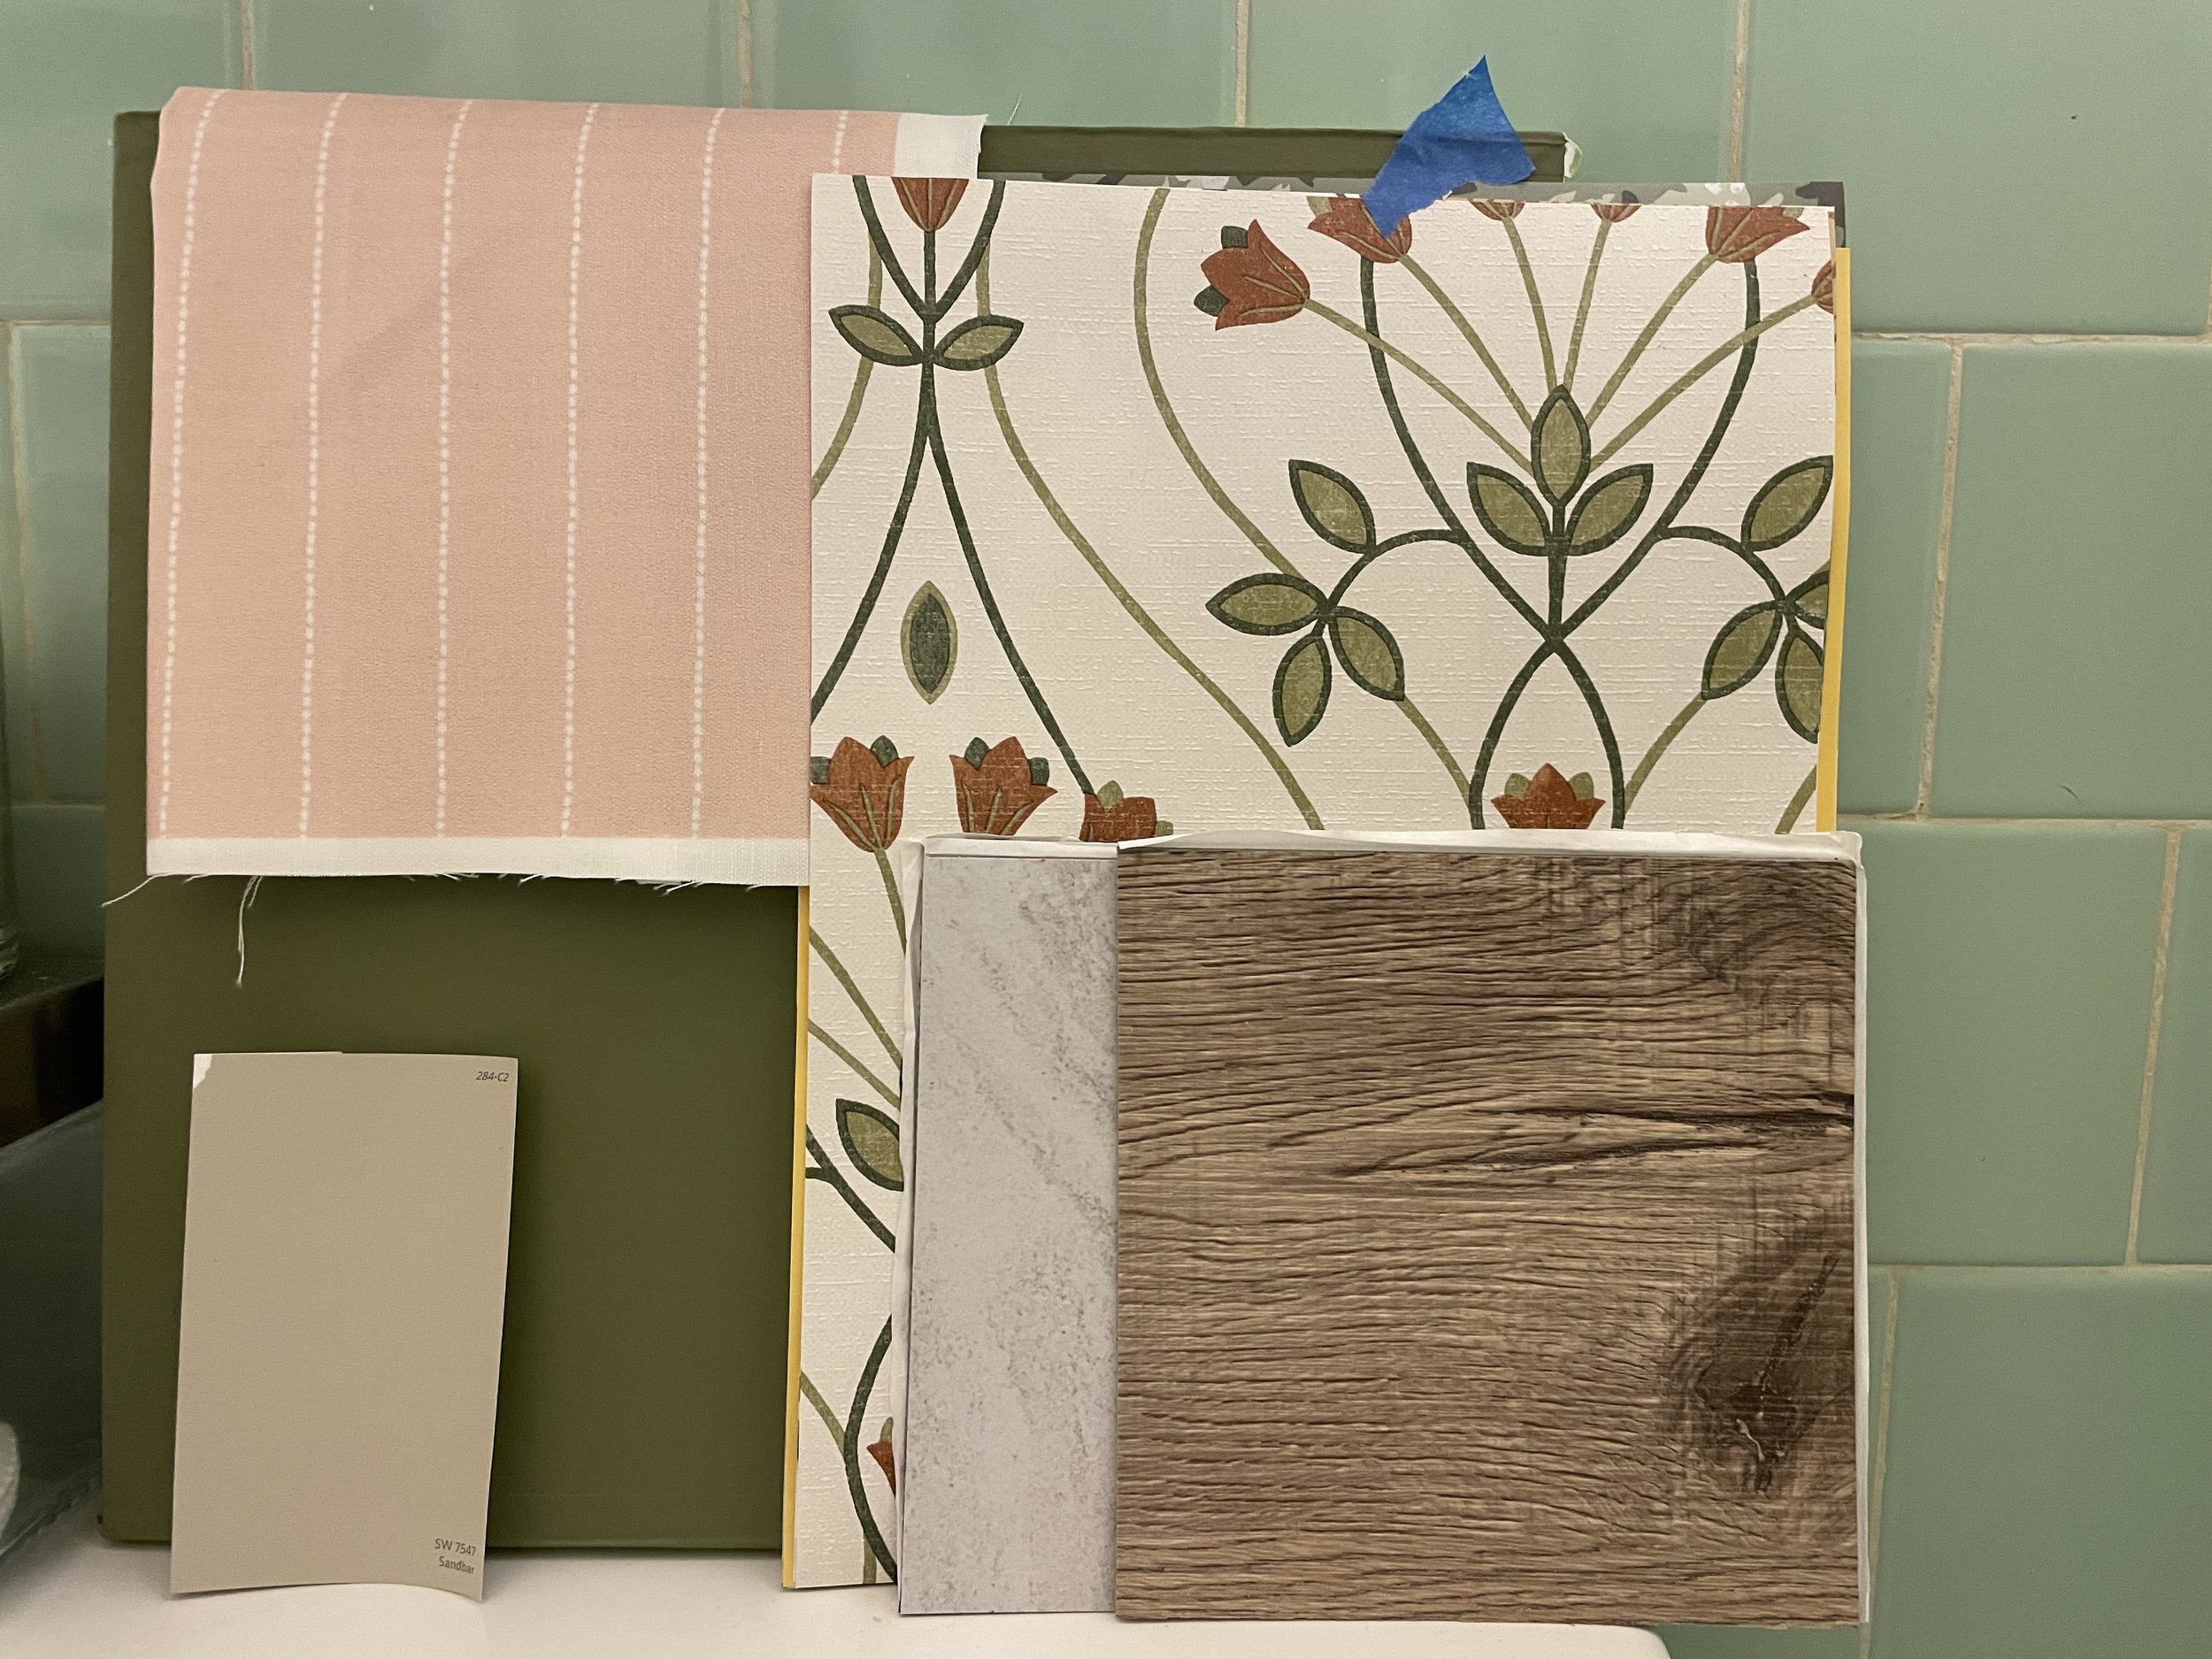
I have to say that while I LOVE the wallpaper, I have not been as thrilled with the floor tile samples. They seem like decent quality, but the color is not quite what I had in mind. It is hard for it to show on camera, but they feel too gray compared to the warmth of everything else. It is back to the drawing board on that one. But I’m sure I’ll find something that works.

At this point, I can feel myself procrastinating about writing about the actual work. Much like real life when I think about doing the actual work on the bathroom. Much of the fun for me is dreaming and planning. It gets a little scary when it’s time to implement the idea. But that’s the whole point, so here goes!

Based on my list of things to do for this project, I plotted out my order of operations, so to speak. I wanted to make sure I wasn’t working inefficiently or doubling back or God-forbid, making extra work for myself. Based on that, I decided to start with the medicine cabinet. The plan was to reuse the existing cabinet and just cut a wee hole in the wall, shove it back there, secure it, and Bob’s your uncle, right? Wrong. Of course the first item would not go according to plan LOL.

just a little taste of the dust. the bane of my existence.

mini’s first experience with a mirror. who is that other cat??

But never fear; I persevered! While I knew I shared this wall with my neighbor’s bathroom, what I hadn’t known was that my neighbor’s choices of medicine cabinet and lighting would affect my ability to change things on my side. In order to recess my cabinet, I needed to move some of the studs around. Except that some of my neighbor’s stuff, drywall even, was secured to the studs I would need to move. Oops. So… I got a little creative. Suffice to say I got the job done without impacting my neighbor, but I don’t think I will put my process on the internet for all to see…

A reminder of where we started

after! i swear, it feels a lot different in real life

In the end, I was able to push my cabinet back and down about 4 inches. The process was so messy and so much work 😵‍💫  but it was worth it!! I learned a few things:

  1. I feel so much taller in the bathroom now that I can see below my chin!! I think I know what being 5’5” feels like now 💁‍♀️

  2. I’m better at the reciprocating saw than I used to be, but it’s still not my favorite.

  3. Safety glasses are not the same as GOGGLES. I suspect that the intense amount of dust is what brought on the pink eye (I never knew it was SO painful!). Henceforth, I shall be wearing goggles.

  4. I am a little obsessed with dust control, but I’m not very good at it. The whole bathroom and even out into my kitchen/dining area was a dusty disaster; I hate that part.

  5. I have a much better idea of how the walls are in this building and what the limits of the shared wall are.

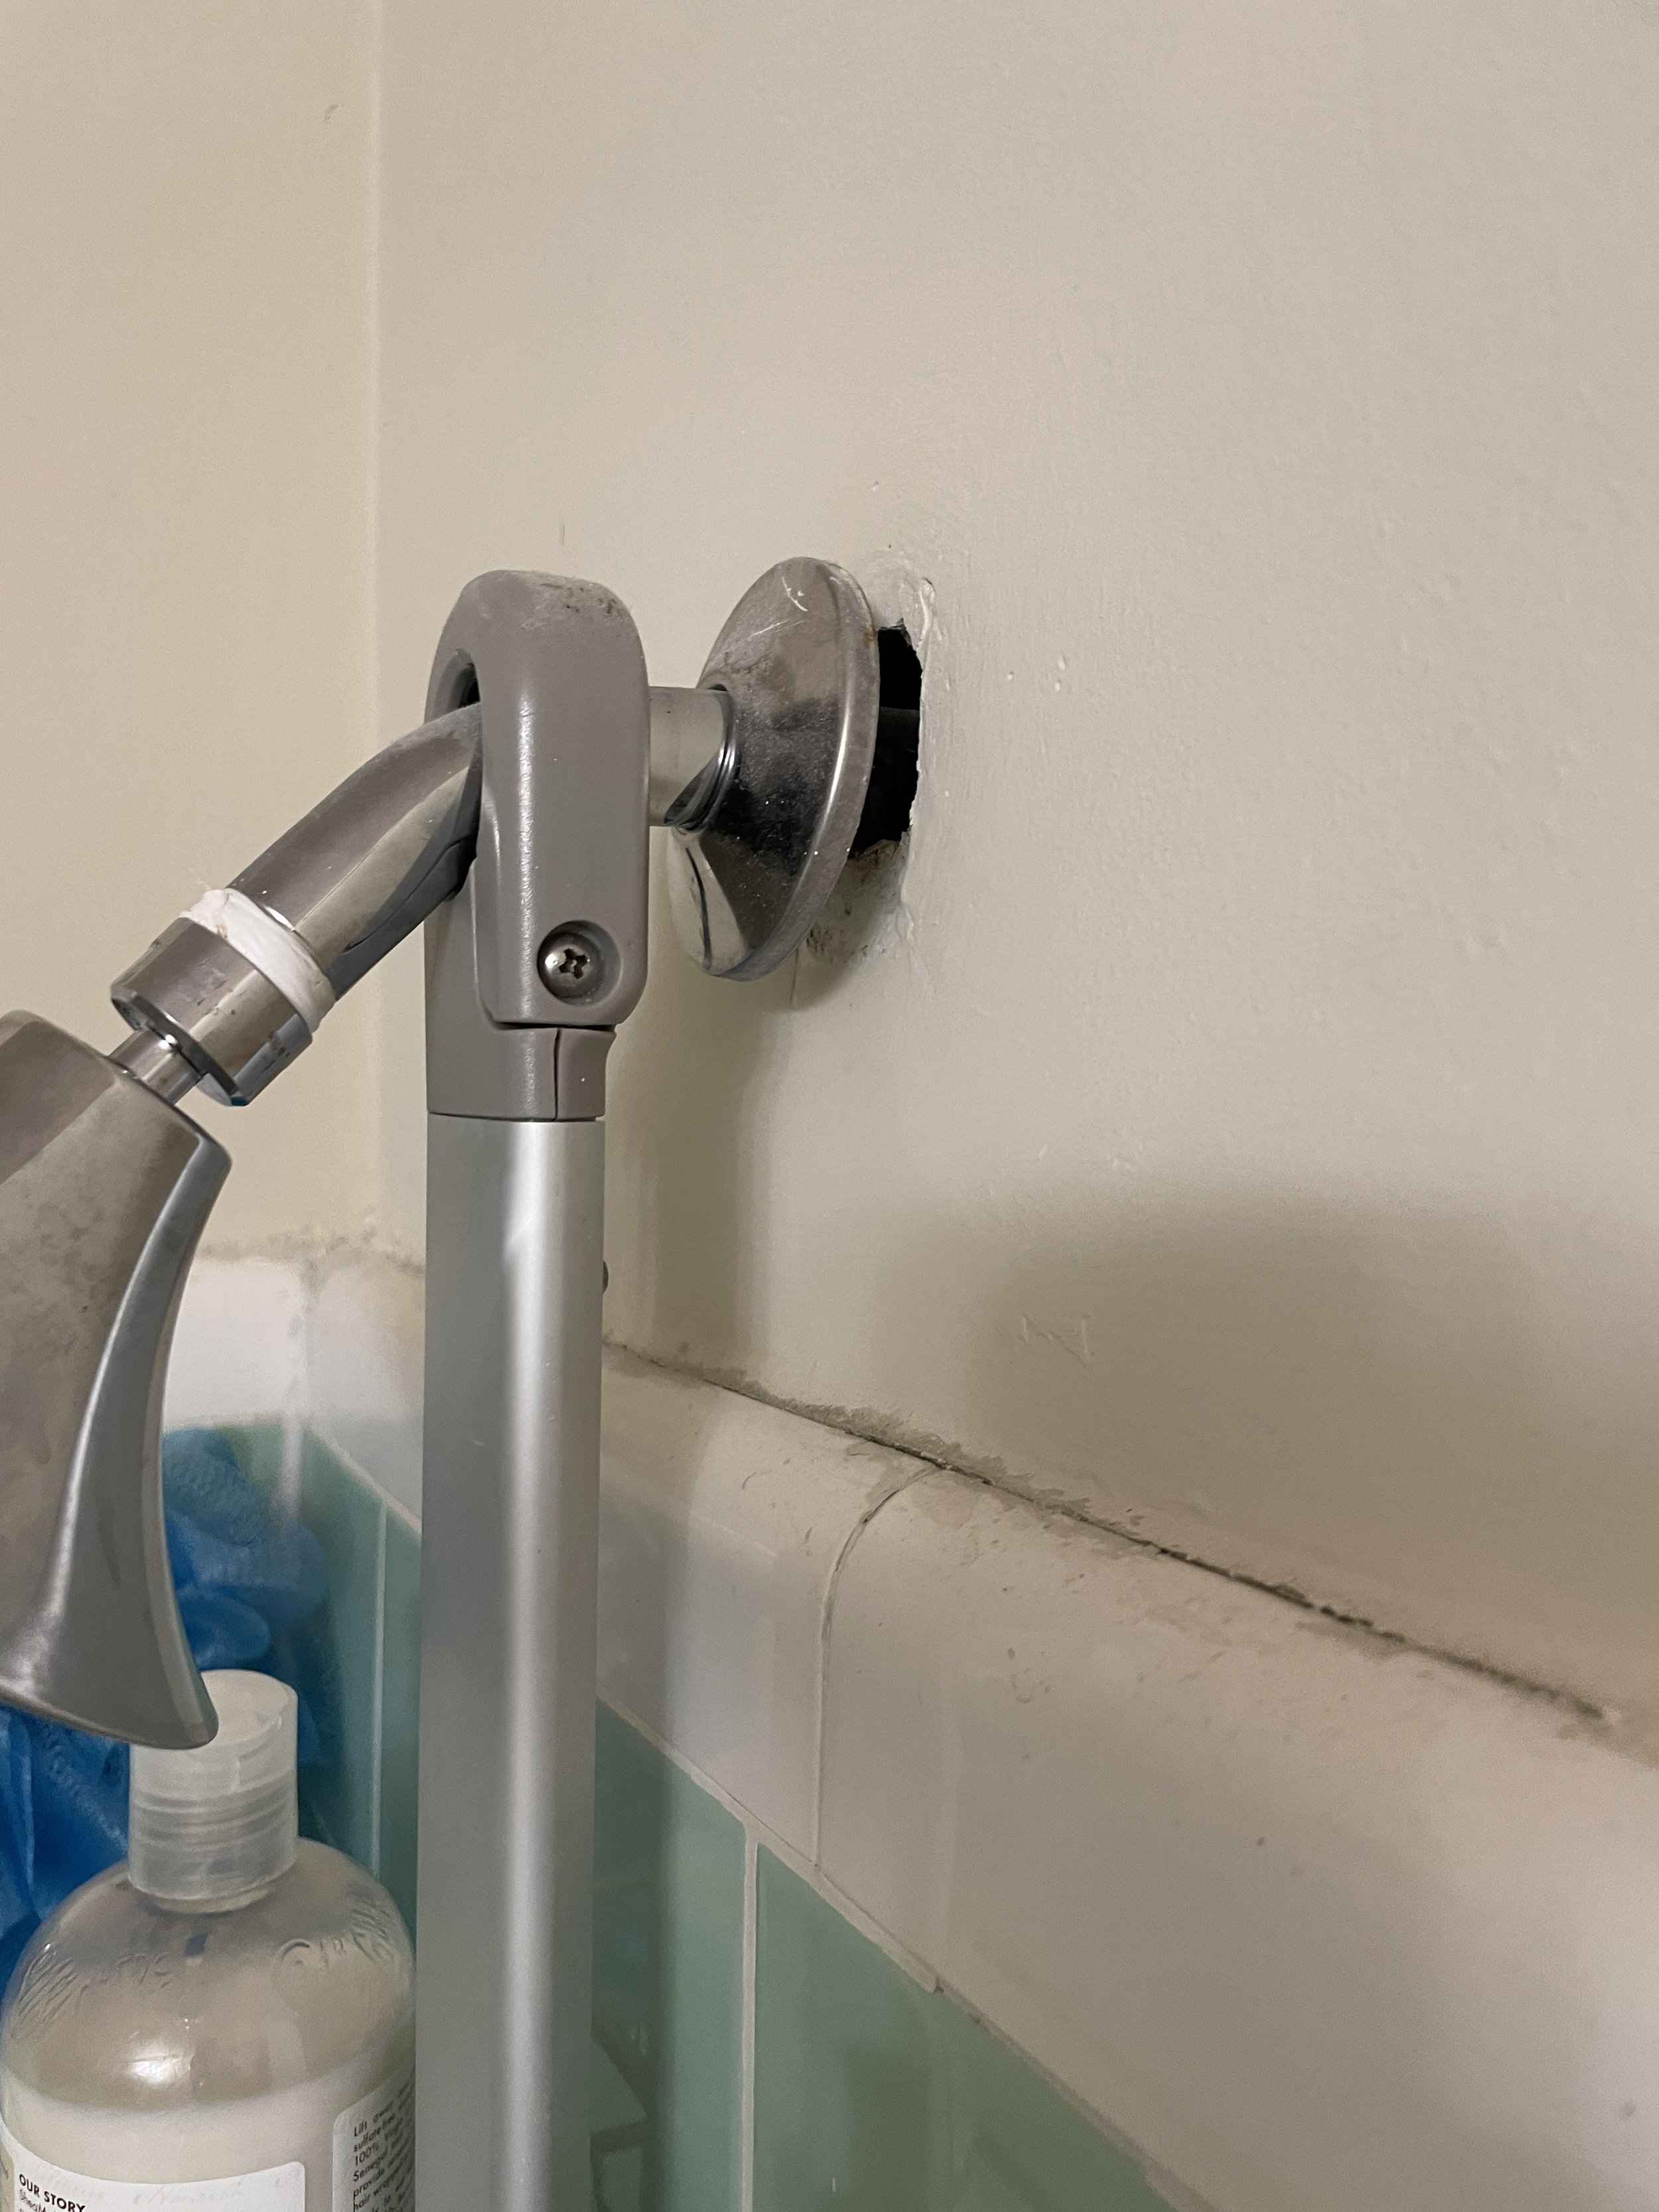
  6. There really was a pretty big hole behind my cabinet already, which I already suspected. It was just interesting to have that validated.

Just a reminder, folks - learn from my initial mistake and get yourself all the safety gear! Drywall dust and wood particles stay in your lungs FOREVER.

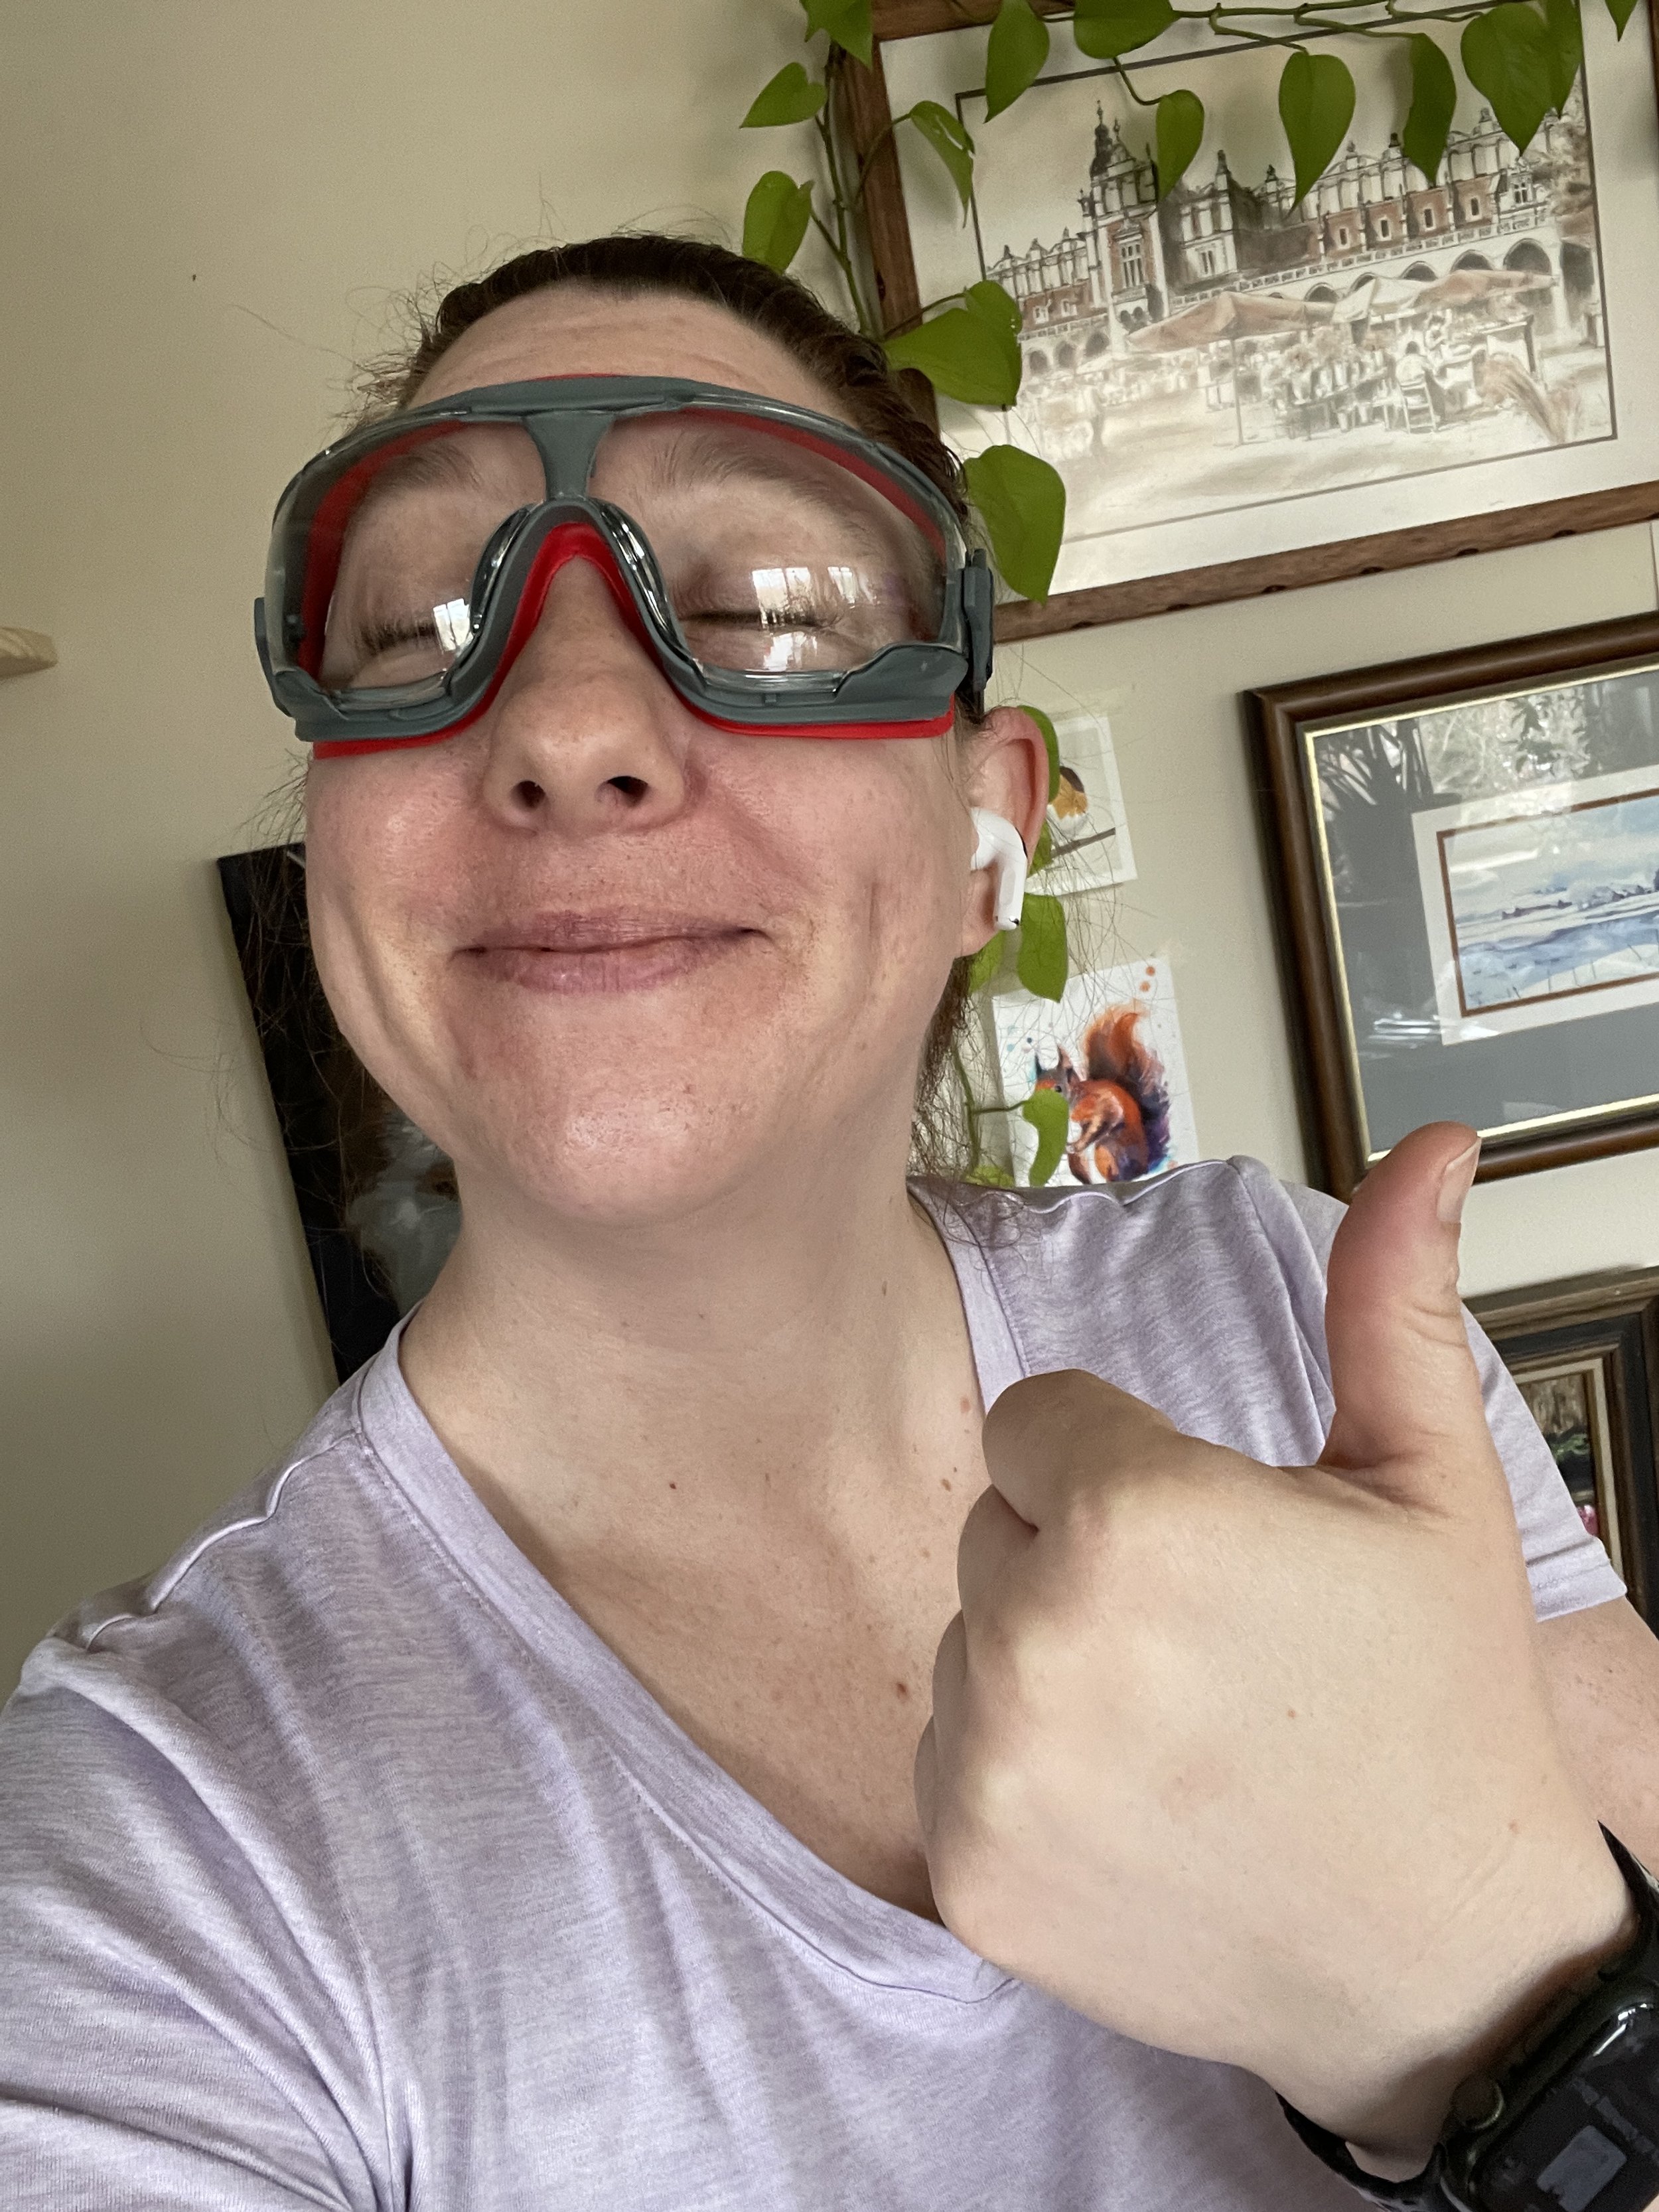
brand new safety goggles

all the safety gear, my friends

As you may have already noticed, I also decided during that work that I would add some recessed shelves between the studs on the adjacent wall. I hacked open a bit of wall and was pleased to see that the idea could work.

After taking care of the medicine cabinet and opening up another hole in the wall, that’s how the bathroom stayed for about 10 days. Minus the dust – that I cleaned up immediately. So satisfying!

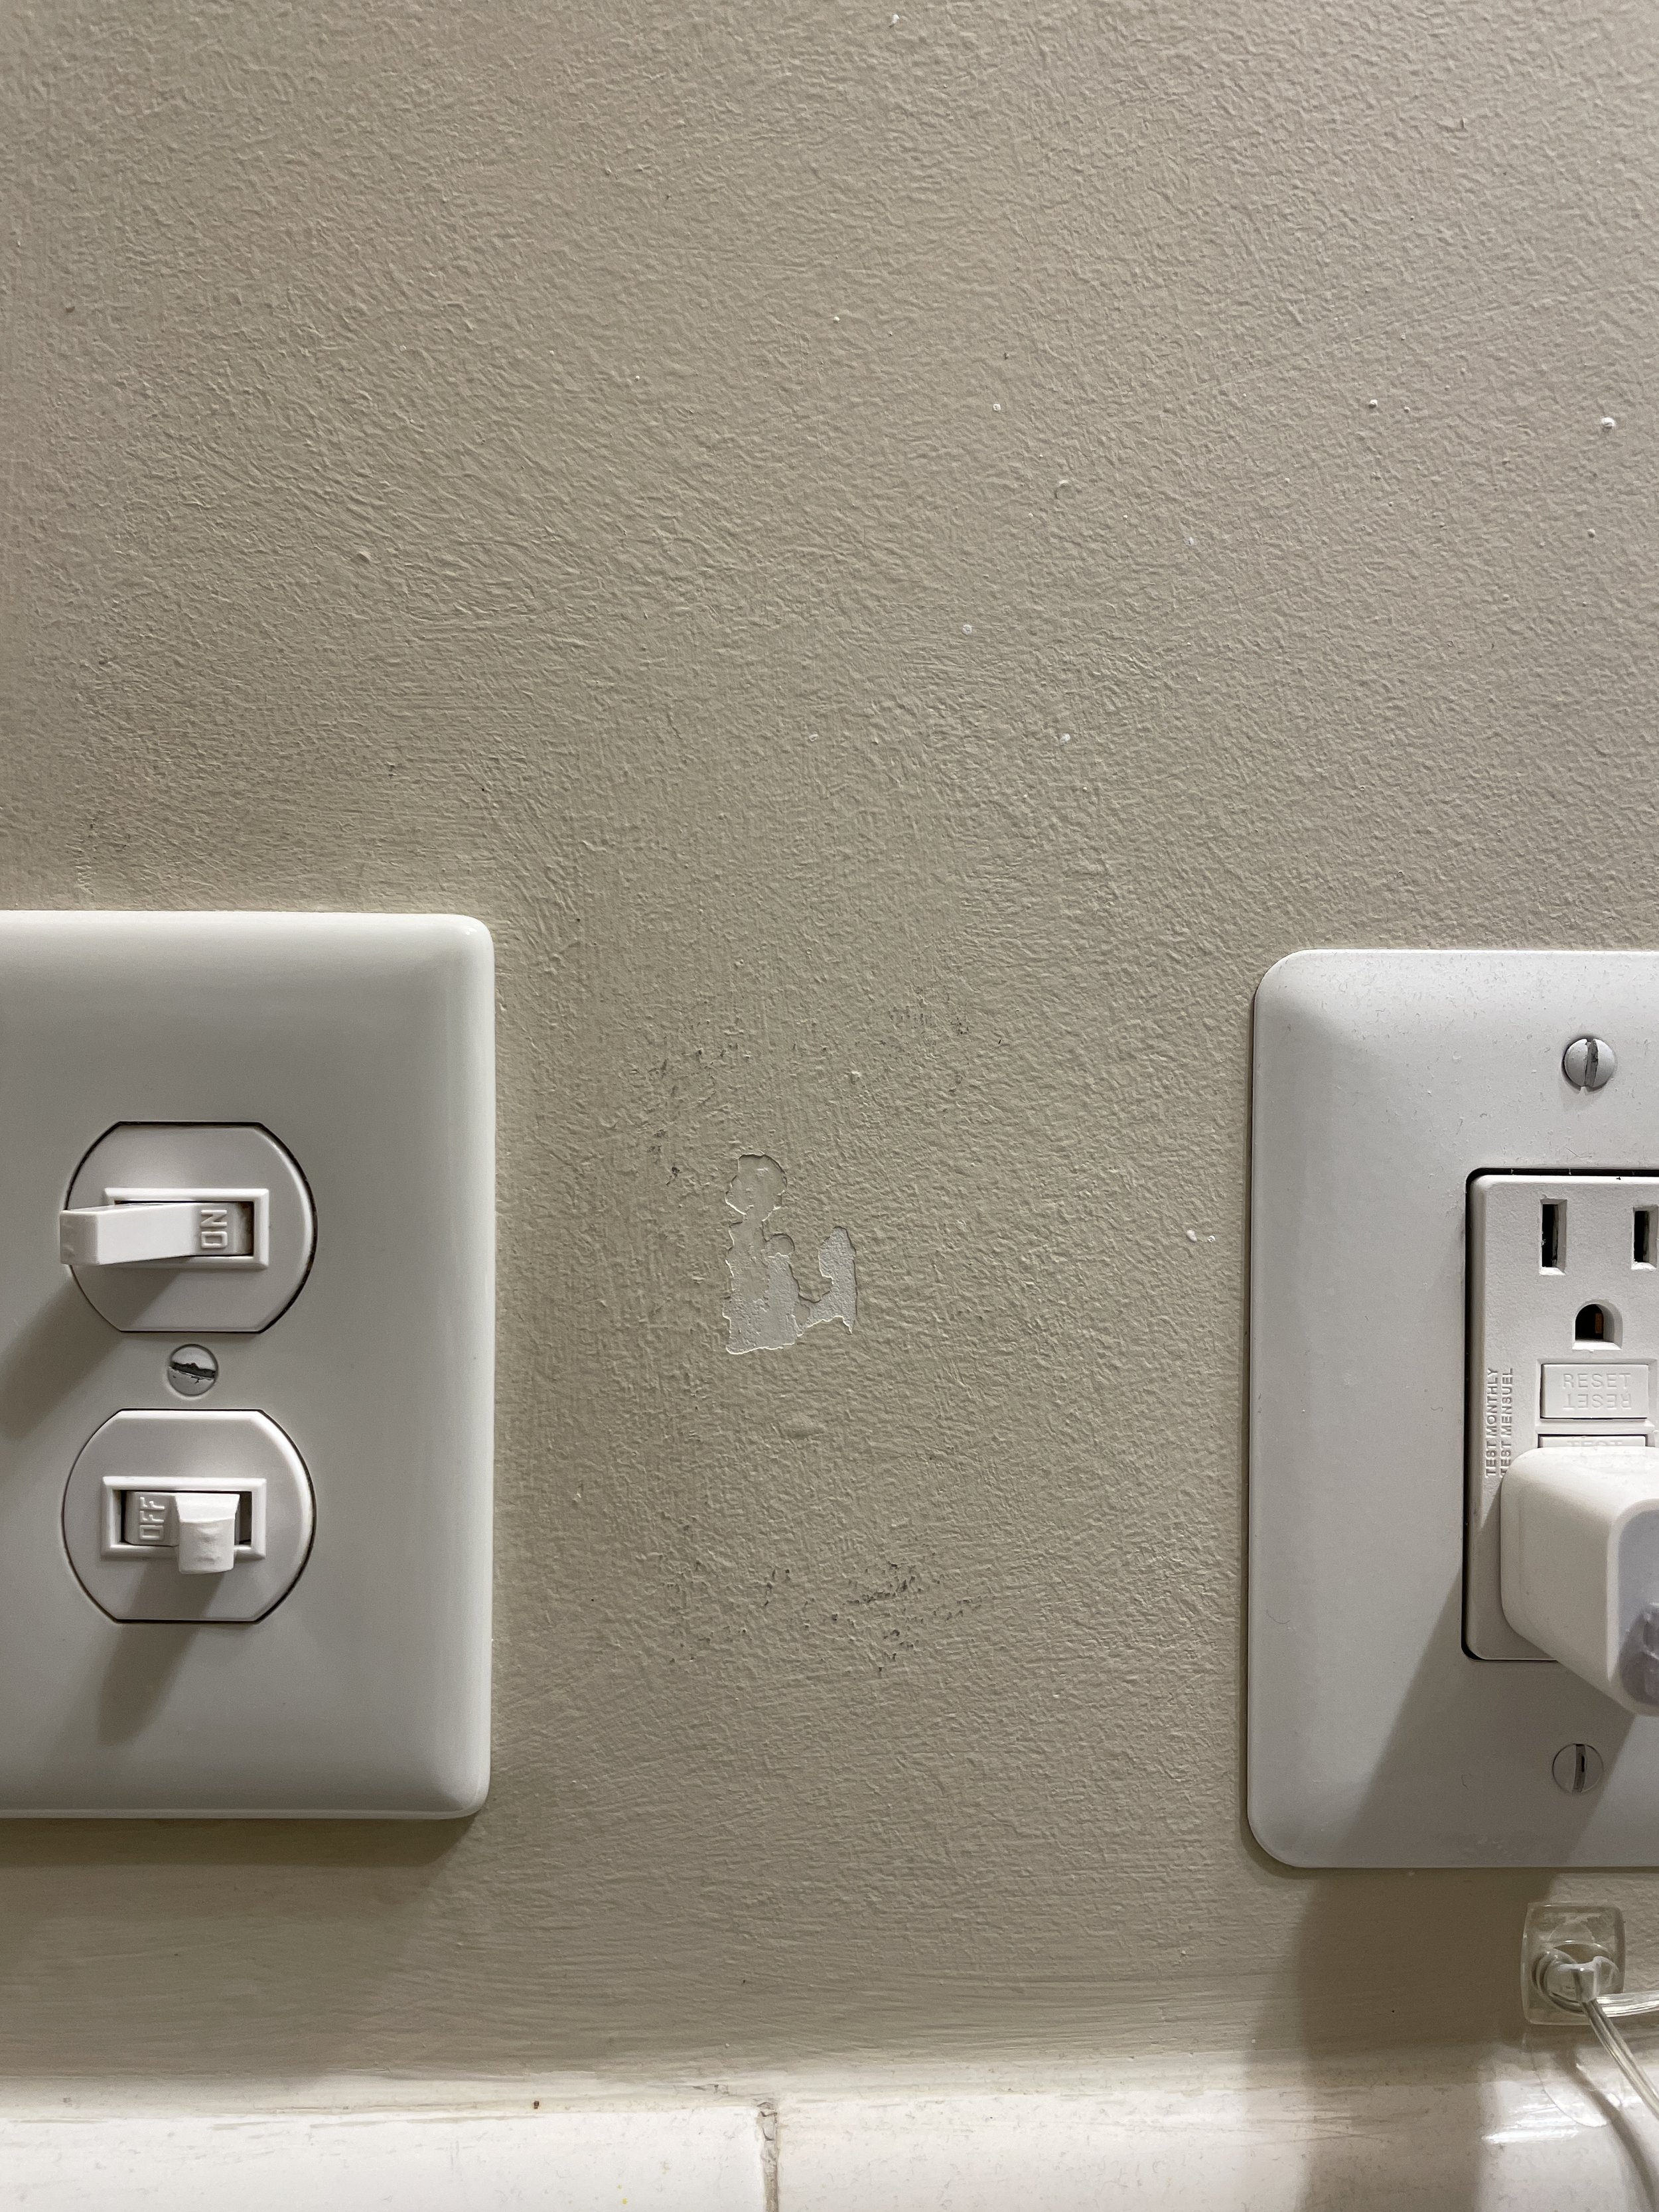
Somehow in those 10 days I got a little intimidated by the next step – patching the drywall. It doesn’t really sound like a big deal, but my anxiety-prone and perfectionistic brain was making it into one. More dust! More noise! Fortunately, the little break allowed me to realize that I would need to move the electrical box up higher to accommodate my new light fixture. It was just the push I needed to get going again.

But that update, my friends, is for next week.

ORC Spring 2024 - Week 2

I don’t want to brag… but this is the second blog I’ve written in less than two weeks 💁‍♀️ Even if I am posting at the end of the window haha.

Not a lot of actual work got done this week. I am still scrambling to get work and life things knocked out. #COVID put me so much farther behind than I thought! On top of that, through the miraculous drug Paxlovid, I tested negative for COVID on Thursday of last week. Saturday morning I jetted off to meet some of my cousins for the eclipse! We picked Dallas as our meetup point in the path of totality. We actually stayed at an Airbnb in Granbury, TX, about an hour and a half west of Dallas. The view was absolutely gorgeous! It was an amazing time catching up with the fam and experiencing the eclipse with them. If you ever have the chance to chase totality, I highly recommend! It was a very unique experience. 10/10.

 Anyhooo, for Week 2 of the One Room Challenge, let’s go over the plans I have to remedy the atrocities in my bathroom. If you didn’t catch that part, you can get up to date with Week 1’s blog HERE.

I’ve have almost 7 years to think about what I want to do to this bathroom. To be clear, this ORC project is a bridge to get me through a couple more years until I want to spend the money on a full renovation, which would look a lot different than this update.  

For starters, I would get rid of the tub *GASP* I know! It’s almost sacrilege to say, but Frank and I don’t use the tub. We would much rather have a large walk-in shower instead. That would be much more practical for us, and I don’t think the lack of a tub would be a dealbreaker for any future renter we might have. It’s a one-bedroom condo; we aren’t going to have any people raising families in here. And if someone should need a tub for a functional purpose, like bathing a dog or soaking something, there are some collapsible options that would fit the bill.

That is the major change I would make. But I would also change the aesthetic in a more refined and permanent way than I will be doing in the next 7 weeks. But that is for another time.

For this update, I started the process by ruminating daily on the functional things I wanted to fix:

  • Better and more shower storage that isn’t visible when the curtain is open

  • Fixing the cracking grout and gross caulk before water damage becomes a concern

  • Giving us a place to put our clean clothes for after the shower, other than teetering on the sink or on the toilet lid

  • Creating more storage in general, including more hooks for towels and clerty clothes (not clean/not dirty clothes that can worn one more time before being laundered)

  • Minimizing grout in general, as it is hard to keep looking clean

  • Generally, fixing a few minor things that are difficult to clean – like closing the gap below the vanity where tumbleweeds of hair go to die. I just never feel like it’s clean under there, even after I vacuum it out.

Aesthetically, y’all know how much I hate the green tile. So obvi, that has to go. I also want more and different colors in there. It’s pretty bland right now. I’ve been really drawn toward English cottage, cozy vibes and earthy colors in the last few years. I will be taking my bedroom in that direction later this year, so I figured I would get started with giving the bathroom a nudge in that direction. I also plan to carry some of the same color palette through to the living room, kitchen, and bedroom so that my place feels more cohesive.

I pulled together some images to get the creative juices flowing and start feeling inspired. This part, while super fun (because SO MANY POSSIBILITIES!!) can also feel overwhelming after a while (because SO MANY POSSIBILITIES!!). I think my clients feel this as well. So, I limit myself after a certain point to stop scrolling and start distilling the common threads in the inspiration images. What is it about them that I am drawn to? Is it the exact item or just a vibe? Once I work on that I bit, I start curating the images that best represent what I’m looking for onto one moodboard.

For my bathroom, this is what I landed on:

From there, I started pulling together some actual products that give this sort of vibe. There are plenty of ways for introduce this new aesthetic, even in such a small space. Everywhere you look, there’s an opportunity to change something. Below is the design board I put together with the product images that I think will work well:

So far, I have landed on the following changes I’ll be working on:

  • Apply a treatment to the green tile to cover it completely; remove built-in shelves and towel bars during this process

  • Reglaze the tub, or research other alternatives

  • Install new shower faucet, trim, and storage

  • Install a decorative treatment on the ceiling for added texture

  • Install wallpaper above the tile

  • Paint vanity and cover portions of the side and front to give more interest and prevent dirt and hair from getting trapped underneath

  • Replace sink faucet and stopper, vanity lighting and hardware

  • Recess the medicine cabinet and add trim

  • Create new built-in storage near the vanity

  • Add more wall hooks and storage shelves

  • Deep clean floor grout and change the color to better match new color scheme

  • Install a decorative treatment on the floor over existing tiles

  • Recaulk the shower and toilet

  • Paint the interior side of the door and secure the Elfa door rack to the door (rather than over the door)

  • Add a magnetic door catch

  • Replace ventilating fan

  • Source a new shower curtain and install a ceiling track

Whew. Anyone else need a wee nap just reading that list? You should see my Asana project for this. It is… quite extensive. I know this is going to be a big challenge to get this done, but isn’t that what I wanted? Of course, I will also miss all of Week 4 due to a preplanned trip to the Dominican Republic to celebrate Frank’s 40th birthday. What’s one less week?…. 😭

Wish me luck, folks. I’m going to need it.

PS. Just a reminder that you can follow along with other designers and participants on the ORC blog HERE! There are a ton of talented people out there, so you should check them out.


One Room Challenge Spring 2024 - Week 1

Hello, internet peeps and real life friends!

After taking an, oh, six year hiatus from blogging, I’ve decided to start up again with a big incentive - the spring One Room Challenge!

Have you ever heard of the One Room Challenge? I am not sure where I first came across it. Instagram, probably. But for those who don’t know, the ORC is an online event started by Linda Weinstein in 2011 to transform one room in 8 weeks. It has grown to involve featured designers and product sponsors and all kinds of volunteer participants, like me!

I have wanted to participate for quite some time. It never really seemed like a good time, but is there ever really? Haha. I finally took the leap and registered, knowing I needed a little accountability.

Then I had to decide which room to do. I live in a one-bedroom condo, so not a ton of options there. But I zeroed in on either the bedroom or the bathroom. I’ve been wanting a bedroom makeover. It’s been in astate of limbo since March 2020 when I redid my closet and floor.

But in the end, the bathroom won out. This was partly due to timing. With only one bathroom, I knew at some point the shower wouldn’t be usable for at least a couple days. I planned to use Frank’s (my boyfriend’s) whenever mine was not usable. However, we’ve decided to also renovate his condo shortly after/during my project. Because why not? Lolz... (Actually, we are renovating to sell it, so soon we won’t even have a backup bathroom option.)

The other reason I settled on the bathroom was functionality concerns. While I never loved the style, it worked fine. But in the past year, I’ve noticed an increase in cracking grout and chipping and staining in the tub, among other things. I decided it was time. Time to give the bathroom a MUCH needed facelift!

So, here she is in all of her mint green, real life glory:

Oof. I know some people love this retro tile. But I don’t. I tried for six and a half years, so I’ve come to terms with the fact that I just don’t like it. And that’s ok for me to want something else. It’s gotten to the point that I’ve started resenting it. You know when you hate something so much you don’t want to take care of it anymore? Yeah. That’s me. I’m tired of mentally cataloguing everything that is wrong or that I hate every day as I brush my teeth, wash my face, and stand in the shower.

So, let’s get into what the actual problems are, aside from color. With my design process, I first identify the problem(s) that need(s) fixing. In this case, the problems led me to some of the solutions I’ll be implementing.

First up, chipping grout and tile:

Yes, it is entirely possible to remove the grout and repair it. But bottom line is - I hate the color of the grout. If I went through with repairing it, I would also want to change the color. Plus, as you can see from some of these pictures, someone already overgrouted the tiles. This is most of what is actively chipping now, and all that would need repaired too. So adding together the chipping grout/overgrout and the ugly color, it just doesn’t make sense to repair. At the least, I was looking at possibly reglazing everything. Hold that thought for later.

Next up - bubbling, peeling paint:

Ok, so those pictures just show the peeling paint. But there is bubbling paint on the ceiling that I don’t have a picture of. Both problems can occur for a few reasons. But I suspect most of the problem is using the wrong finish (flat, which also shows dripping marks from humidity of a boiling hot shower) and the walls not being clean during the last coat of paint (sloppy painting by the flipper who turned over my condo).

Circling back to tile for my next gripe - these built-in items:

These were so popular. Vom. I despise them. There are more above the sink and in the shower. As you can see from the above picture, one side of a towel rack that we never used anyhow crumbled to bits about a year ago. Whatever solution I land on will need to encompass getting rid of these things.

The next category can best be described as general jankiness (TM):

Chipping tub (I’m going to guess it’s been reglazed twice already), caulk in terrible condition, and parts separating from the wall and dusty grime. Ick. Definitely time for this to fix this.

And finally, the aesthetic choices made by the flipper. I would say this mainly encompasses the floor, vanity, and medicine cabinet. The vanity, surprisingly, has a good amount of storage for how small it is. I just don’t like the look of it.

The floor… is just so white and has large grout lines that are so hard to keep clean. You can see the remnants of a lockdown boredom project, where I stenciled the floor. I used only what I had on hand because that was still the time of not being able to get your hands on hardly anything from Home Depot. It was the wrong color + wrong product, and it lasted for maybe a month before I had to scrape off the peeling disaster. I guess I never got around to the border? Oops.

And the medicine cabinet. It was so awkwardly placed, especially as a short person. The wide angle I took this picture with makes it seem like you can see more. But basically, I can only see my head in it. I was convinced that it was put there just to cover something up, and I’m curious if that notion is correct. How high the cabinet is and how it juts out from the wall also blocks a lot of the light coming from the ugly fixture. It would be nice to replace that.

Ok, I think that just about covers it! Next week, I’ll walk you through my inspiration for the new look and the design board before we jump into the fun of demo and see some actual progress in Week 3!! Can’t wait! I hope you care to follow along too :)

Just a reminder that you can follow along with other designers and participants on the ORC blog HERE! There are a ton of talented people out there, so you should check them out.

PS. These posts will typically come out on Wednesday of each week. I’m a little late to the party this week because #COVID. Womp womp.

How I've Stuck to Meal Planning (Finally!)

How I've Stuck to Meal Planning (Finally!)

Meal planning is not something that has come naturally to me. I have managed to muddle my way through feeding myself in my adult life but not without trials and tribulations. How often have I stood, despondent, in front of the fridge or cabinet only to settle on eggs and popcorn again? Too many times to count. This year, I decided to get my act together, and here is how.

Read More